No foundation glam

Hello my lovelies, long time no see, how are you all?

Im sorry i’ve been inactive for a while i’ve been super busy on other projects and GCSEs and silver DofE… but im back now so will be posting a lot more. Anyways dont want to bore you but i felt i needed to address my absence and apologise.

This is my no foundation but still glam makeup look for lazy days, or days you just want to let your skin breathe without looking 100% gross, Hope you enjoy…

This is my everyday makeup when i dont want to look like a gross egg, but want to let my skin breathe with no foundation. I start with my Radiance face wash by Burt’s bees then my Neal’s yard ‘Daily moisture’ so im glowy af because if im not going to wear foundation i want people to know im not.That sounds weird but do you get what i mean? Im like yes i have got foundation on but yeah i still look bomb it’s like a satisfaction thing… although i normally dont look bomb i look dead. Anyways the only other things i put on my face are some natural bronzer by Rimmel in sun bronze, my natural Lancome rose blush and my highlight.

For the glam part i like to wear bold but simple eyeshadow so i dusted a yellow eyeshadow from kiko in the shade 19 all over my lid. To darken the eyes i put tiki hut by makeup geek in my outer third, on my lower lash line and lightly in the crease. After some winged eyeliner (which is a killer to do) and some brown eyeliner in the water line, i top it off with mascara and bam it’s done. It is super simple and takes 5 mins max so i love it as im lazy, and its bold so looks like a tonne of effort when it really isn’t.

The last steps i do is put some Carmex on my lips and fill my eyebrows in like normal with my Anastasia dip brow in dark brown. Some days i will shove on a bold lip to but as i still have acne scaring a pink or red would bring out the colour of them making it more obvious. Plus not having a lip focuses the attention on my eyes not my naked skin, which is great and kind of what i want.

Thankyou for reading again im sorry ive been inactive for so long hope you have a lovely summer and week. love Abi xx

Sunset eyes 

Hello, how are you all i feel like this is majorly overdue sorry! But anyways im going to be doing my own take on the sunset eye however this will be using minimal and SUPER affordable products so you can slay without breaking the bank. That kind of sounded like cheesy advert sorry, but yeah lets go.

Im not going to show you my base because feel like ive told you a million times and its just boring really i certainly wouldn’t want to read me going on about it! So im just going talk you through the important bit, the eyes.

To start the eyes like i always do i slap on the urban decay primer potion in eden so i get a nice smooth base. For this look i only used 4 colours all from the drugstore apart from one sorry but its easy to find a variation so its super affordable. I first took the colour 19 from kiko which is a bright yellow in my crease and up to my brow bone, you want to get this high as it needs to be visible over the orange. then just above my crease i took the colour burnt from makeup obsessions which is a bright burnt orange as he name says and blended this in not going to high but blending it out with more yellow so there isnt and harsh lines. On a small blending brush i took bitten from makeup geek and put that right in the crease not blending it into the orange to much. for the lid shade i took wine n dine from my violet voss holy grail palette which is a beautiful pinky purple and buffed that out with bitten so there wasn’t a harsh colour difference. On my lower lash line i took bitten close to the lash line and the yellow shade to buff it out. i then applied a winged eyeliner bigger than normal and applied mascara added some inner corner highlight and bam, i was done.

Thankyou all for reading my summery looks, i want to get more creative with my look as why not so i will be shoving loads of colour and glitter on my eyes because being crazy is what life is all about! 

Have a lovely day, love abixx

Who says you cant wear yellow? 

Hello ny lovelies so recently i was in kiko and i saw this bright yellow and i was just like i’ve got to have it its stunning! My mum said she didnt think it would suit me and it would look silly, so i decided to get it and prove her wrong and im so glad i did. 

This wont be everyones cup of tea as they say but hope you enjoy anyways.

First i started with my urban decay primer potion in eden then my bronzer as a transition colour. I blended tiki hut by makeup geek into my crease and half way across my lid. I darkened this with a dark orangy brown from my morphe 35W palette, then a cool toned brown colour on the outer corner of my eye. For the lid i took the shade 19 from kiko (the yellow), then a champagne high light in my inner corner also from kiko in the shade 16. To finish of i created a wing with my seventeen black eyeliner and tight lined my top and bottom lashes with a brown liner from maybelline in the shade matte occhi. After running tiki hut along my lower lash line i applied my lash sensational mascara and i was done. 

Thankyou for reading hope you enjoyed; oh and what would you like to see next a q&a or a challenge? 

Love abixx


Queen of the Covergirls inspired look

​Hello my lovelies, so it has been a while how are you all? so can i start by saying James SLAYS he is literally my aesthetic he is stunning. I hate it when they say that boys cant wear makeup or do makeup because they can, my two makeup idols are Manny MUA and James Charles because i mean look at them! If you haven’t by the way look them up you will fall in love!  

I tried to re-create this gorgeous instagram look by James but in a more natural way, i mean i wouldn’t wear the eyeshadow but it is more for all my makeup lovers with balls this is for you!  My makeup skills are no where near his but i tried. Ahh ok, here we go.

So in the look the eyes are very elongated and bold contrasting with his blue eyes, i have boring hazel eyes so the red didnt seem as bright as his. I started with the naked weightless concealer on my lid which i set with a translucent powder. The actually eyeshadow is very simple which was very good! in the crease i started with my bronzer then mixed in shade 157 (shimmery red) from Inglot, i also put this in my crease. Make sure you blend this outwards just past the edge of the brows this gives it that cat eye effect, the key with this look is to blend until your wrist hurts! Next i took Bitten by Makeup Geek and placed that in the outer part of the eyeshadow flick.. (dont know what to call it sorry) and the inner crease lightly joining it up as if it was a halo eye, aswell as this i smoked it under my eye connecting to the eyeshadow flick. On the centre of the lid close to the lash line i placed the shade 55 from inglot which is a golden bronze. In the water line and tight line i put my Lancome black pencil eye liner, then smoked it along my top lash line. Finish the eyeshadow look with a generous coating of mascara and a highlight in the inner corner to open up the eyes. In James’ look he is wearing falsies but i cant do them to save my life so im going to pretend i skipped them to make it more natural. 

Do your face makeup like normal but go to town on the contour and highligt, litterally guys it didnt pick up on the camera but i awas blinding. Oh also i wass watching this youtube video where they said a big makeup mistake was to blind people with highlight and classified it as the worse trend 2016!! I KNOW i was like dying!  Anyways freckles is one of the things James is known for and he rocks them! His are very bold and i sadly wasn’t brave enough for that so i died them down abit to make it more wearable but like i said if you’ve got balls rock heavy ones! To do this i took my anastasia dip brow in dark brown on a tiny morphe brush and dotted them all around my face. If you think they’re to dark lightly patting them makes them fade slightly.

Next i filled my brows in normally however using darker brow powder over my dip brow as his brows are very dark. 

For lips i picked two options a more casual one but still very James, then a diy one similar to the one in the inspo picture. 

1st Option…

So this is the classic red lip with a twist i took the red shimmery eyeshadow and placed it in the centre of my lips  with some gold to give it a metallic finish but keeping it classic and autumnal. 
2cnd Option…

The lip james was wearing was a matte grey brown. I dont have this colour (if you have one similar use that) so i decide to diy it! for this i took a matte browny grey eyeshadow and pressed that onto my lips over the top of a nude lipstick, and then cleaned it up with my foundation. 

Thankyou so much for reading and getting me to 950 followers that is literally ridiculous, i love you all so much have a lovely week! 

Love abi xx

Tarte Water foundation first impression 

​Hello my lovelies, how are you all? 

I feel like it has been a while since i’ve written a blog because it’s now autumn which is my favourite makeup time of the year, as it is the time where out inner goth can come out in vampy lips and smokey eyes. Then it’s HALLOWEEN comment below what you’re being i woulod love to hear your ideas. Anyways keep your eyes open for autumnal makeup looks and halloween ideas. 

Moving on to the real reason you all came, this is my tarte rainforest of the sea water foundation first impressions. Ive seen this product everywhere but haven’t managed to get my hands on it because i live in the UK and our makeup game is low. After unsuccessful Tarte and  Sephora orders i managed to find it at Roses beauty store, which is an online beauty shipping american makeup to the UK. 

Before i talk about the foundation i want to talk to you about the store, my product was delayed as the didn’t actually have it avaliable so it took a week to get to me plus normal shipping time, which was very annoying. However the customer service was amazing and did everything they could to get it to come to me quickly, so that was fine. Apart from the shipping problem i would really recommend this site,  and i know i will be using them again.

 The foundation… 

I had heard so much good things about this foundation but i was sadly let down for numerous reasons which was dissapointing since i had been wanting it since it came out. 

It was recommended to use a flat top brush with this foundation but after testing it out i found like many other people the beauty blender worked better. 

Excuse the lips i had lip stain on that day and well it stained! To try and build up the coverage i experimented with different amounts of product, but whatever i did it still looked cakey and fake. which was a selling point that it would look natural and flawless. You can’t see the cakeyness on camera but in person a lot of people did say it was obvious i was wearing foundation or commented i was wearing more than normal, which was not my desired look. If you can get away with minimum foundation this could work for you but if not i wouldnt risk buying this. 


I’m making it out to be totally awful and honestly it was for my skin but the packaging is truly beautiful, Tarte really outdid themselves on that like always. The colour match was also perfect to the description given on the Tarte website and they catered to all skin tones and undertones which was amazing as you have a wide range to pick from. I got the shade Fair Neutral which as you can probably guess is for vampire people with yellow and pink undertones. I really suggest paying alot of attention to the shade descriptions before you purchase because they are very accurate and detailed. 

Here is the foundation with the rest of my makeup on, as you can see from the picture it looks flawless and glowy, so i would suggest this for a photoshoot as it looks incredible. However up close in real life it still looks cakey and patchy, so avoid it if you have acne prone skin and need max coverage. Remember though guys everyone’s skin is different dont be put off the product by my review, just because it didn’t work for me doesn’t mean it wont for you! like the Loreal true match foundation does the same thing as the Tarte foundation and that is one of the most loved foundations, so if that works for you the Water foundation could to. 

Thankyou for reading, hope you have a lovely week; if you would like to see a tutorial on this look please let me know and i would be happy to do one. Oh and guys… WE GOT TO 800 FOLLOWERS and were 30 away from 900 how insane is that!! I literally can’t believe it thankyou SO SO much for sticking with me and reading my blog it means the world! Just wanted to say how amazing you all are and how shocked i am. 

Thankyou again, love abixx

Vegas inspired day to night transition look 

Hello my lovelies, how are you all? 

So i think we all have had the struggle of being in a rush and having to attempt a day to night transition and it not looking flawless. In this post i will be showing you solutions to a quick simple switch to get you ready for a big night out.

Vegas has always been a place ive wanted to visit its full of bright lights, big names and a glamorous people. When exploring all the things you can do whether it is day or night you want your makeup to look amazing always, but in reality thats not always the case, so here is a simple look to make hopefully a little easier. I was challenged by vegas.com to create a makeup day to night transition look inspired by one of their many beautiful hotels. The range of hotels is as amazing as the interior they’re all fitted with night clubs, glamorous parties and 5 star restaurants so you dont even need to leave your hotel! If you’re planning to take a trip to Vegas a good option would be to check out their great Las Vegas package deals that are perfect for holiday getaway. 

I eventually picked the hotel  Venetain which is a luxorious Italian old-world style resort, to create my look around. Its got everything from gondolas to some of the best places to shop and dine. Italians are generally very tanned so i plan to do a bronze glam look to show the heratige of the building but still incorperating gold inspired by the Venetain’s stunning interior as you can see above. 

The day look…

The Venetain as i said is covered in gold rooms and marble floors. To recreate this for the day i put an oranagy burnt gold all over my lid with a bronze crease. This look may be more of a night look for some of you but this is my day look i hope you enjoy.

First i start with my Bareminerals Blemish Ready powder founation as for a day look you dont need lots of coverage. I buffed this all into my face apart from around the eyes, as i applied a morphe concealer a few shades lighter than my skin in that area.

I bronzed my skin with the Makeup Revolution bronzerand darkened it up with a shimmery bronzer in the same palette, so i could be as golden as the Venetain. As a blush i took my lancome blush on the apples of my cheek and went over it with my pink subtle highlight to create a healthy glowy look. To ‘snatch’ my nose i took the same bronzer on the edges of my nose and across the middle creating a button style nose; to make it more natural you can take the brush you applied foundation with and go over the contour with it. As a highlight i took a white highlight  with golden reflects on the tops of my cheek bones, cupids bow and tip of my nose. 

In the day i would want my eyeshadow to me quick, simple but still stunning, so i can go explore the sights early whilst still looking put together and glamorous. For the eyes i started with a Morphe concealer that i set and used in the place of a primer. I went in with peach smoothie from makeup geek then went over it with a burnt orange from my Morphe 35W palette. All over the lid i took the shade 157 from inglot which is a golden orange shade, then i darkened the crease with my bronzer. I took  peach smoothie and the inglot shadow called 157 sweeping it across the lower lash line, to finish in the inner corner i put the shade  09 from inglot in my inner corner. To finish i applied several coats of maybelline lash sensational mascara and its done.

Finally i did my lips which is as simple as anything, i lightly outlined them using my foundation to make it look more natural. Then applied my carmex lip balm all over my lips to keep them hydrated all day, then a light coating of gloss in the centre to add a sheen.

The evening look…

This look is to get you ready for the exclusive parties and nightclubs the Venetain has to offer whilst taking less than 15 mins to change.

To start with added more  foundation in the areas i felt i needed it, creating more of a full coverage look. I also added my a light contour to create a more dramatic look,  finally i added more of the golden highlight intending to have the same effect as the contour. 

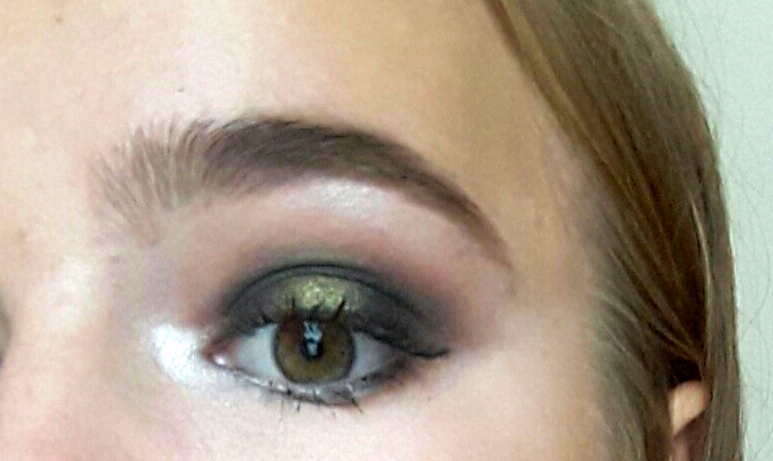
The eyes require a little more effort start by taking the gold off the centre of the lid, as we will be putting glitter there. Keeping the existing eyeshadow i darkened up the crease, and the inner and outer corners to create a halo effect, using a brown orangey colour from the morphe 35w palette. Using the same palette i took a darker colour, and built it up in the same areas to make it more dramatic, however still making sure the orange was visible higher up. Using a lash glue i put gold strictly glitter on the lower centre part of my lid to make the eyes pop. I also took the glitter on the bottom lash line in the middle to balance it out, after i swept the inglot shadow 157 under it. Finally i took my maybelline mascara and thickened up my lashes. 

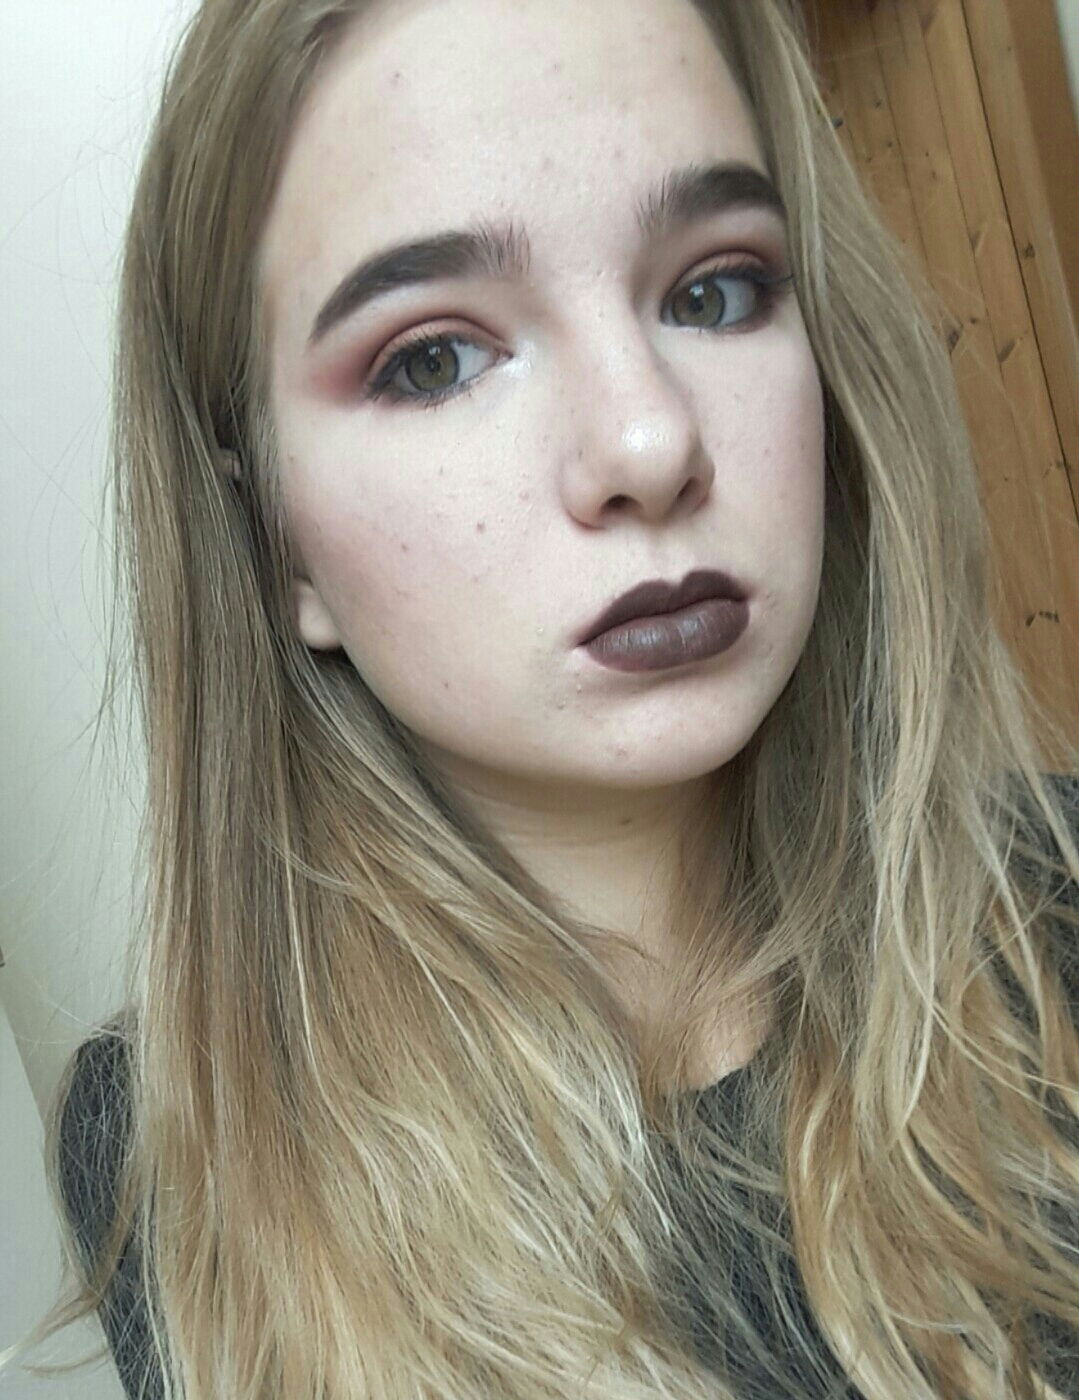
For the lips i have two options. Number one is to apply a nude lipstick to keep the attention on the eyes, for this i used Rimmel London’s Kate lipstick in shade 03. The second option is colouring your lips in with a berry lipliner, i used Rimmel lip linner mauve shimmer and the patted some highlight in the middle to make my lips appear bigger. 

Thankyou all for reading, i had such a fun time creating this look for you all i hope you enjoyed. I hope you have a lovely week, don’t forget to check out Vegas.com and their amazing package deals

Love you, Abixx

Green halo smokey eye

Hello my lovelies, how are you all? Guess what… I HIT 700 FOLLOWERS i know it’s insane thankyou SO much for once i’m actually speechless you guys are amazing!! 

So this is a smalo (halo + smokey) eye thats not a thing im pretty sure but im just going to pretend it is. This look was inspired by the shadow venom from makeup geek, which is a beautiful shimmery dark green. As you all know im rubbish at smokey eyes but i attempted one for you i hope you all enjoy. Oh and have a lovely weekend i hope the weathers better than it is here in typical rainy, stormy England.

Im just going to go through how i created the eyeshadow look and skip the face because you’ve all read me do that a million times, then i will give you some tips on doing a smokey eye.

The look…

So first most importantly especially for when you’re going to be using dark colours, because panda eyes aren’t a cute look on humans to be honest, you should apply a base for this i used a morphe concealer from lid to brow bone then set it with a translucent powder. 

For the crease i applied peach smoothie by makeup geek on a big fluffy brush followed by a burnt orange from morphe 350 palette on top blending it quite high. To darken up the crease i added a dark brown also from my morphe 350 palette and focused that mainly on the outer v and the outer third of my crease. 

For the lid i took a black eyeshadow on a flat brush and applied that all over being careful not to go to high, then i buffed this out dragging it  into the crease to give the smokey effect. When that was as dark as i wanted i went over it with peach smoothie to blend the colours together and leave no harsh lines. 

For the halo part of the eye i took venom by makeup geek on a wet small flat brush to get more pigment, and put that on the lower center part of my lid, so it doesn’t mix giving me a shimmery crease which i dont want because im not about that life. 

Under my eye i put concealer cleaning up the edge of the eyeshadow and concealing dark circles. As always i set that with my lancome translucent pressed powder. Under my lash line i put peach smoothie followed by the black eyeshadow, blending it out on a small fluffy brush with the burnt orange to make it mirror my eye look. In the inner corner and brow bone i placed a white highlight from makeup revolution to make my eyes pop; add a few coats of mascara its finished.

Top 5 tips… 

  • When creating a smokey eye blend blend blend if you think you’ve finished you aren’t blend again, this will make the look appear so much nicer and put together. 
  • When using dark colour apply concealer after so you can wipe away any fallout, so you wont look like a panda.
  • Only apply the dark colour in the outer part of your crease and blend inwards creating a soft sexy effect.
  • Always apply a bit of the darker colour on you lower lash line to tie the look together and balance it all out. 
  • When using a green shimmer apply a black eyeshadow as a base because it makes it more vibrant.

Thankyou for reading hope you enjoyed it was something a bit different if you prefer this type of makeup please let me know. Have a lovely day thankyou again so so much for 700 means the world! 

Love you, Abi xx